
If you have ever wanted to add an AI chatbot to your website, you may have assumed that you need to build a backend, connect an AI API, create a database, and then figure out how to deploy everything.
That is not necessarily the case anymore.
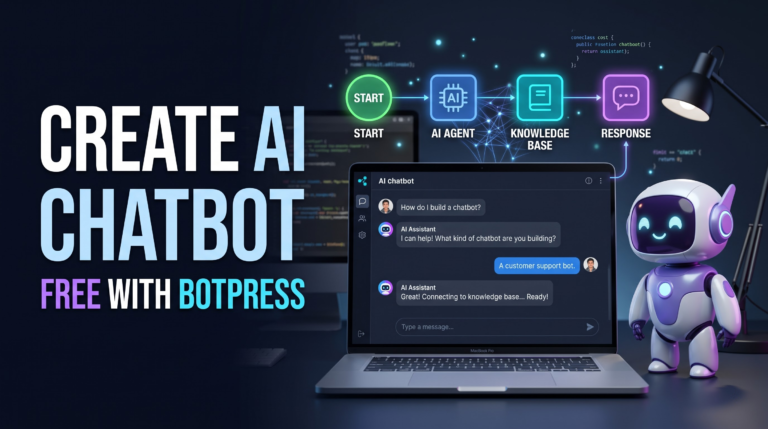
Tools like Botpress make it possible to build an AI chatbot using a visual interface. You can give the bot instructions, connect your own knowledge, test it, customize the chat interface, and finally add it to your website.
In this tutorial, I’ll show you how to create a simple AI chatbot using Botpress, step by step.
No complicated backend is required for this example.
What is Botpress?
Botpress is a platform for building AI agents and chatbots.
Its main development environment, Botpress Studio, provides a visual interface where you can create workflows, configure AI behavior, add Knowledge Bases, test your bot, and manage other parts of the agent.
The basic idea is:
Botpress
   │
   ├── AI Agent
   │
   ├── Workflows
   │
   ├── Knowledge Base
   │
   ├── Tools
   │
   └── Webchat
You don’t have to understand all of these on day one.
We’ll start with a simple chatbot and add things as we go.
What We Are Going to Build
For this tutorial, let’s create a simple website support chatbot.
Imagine that we have a website called SeeB4Coding.
The chatbot should be able to answer questions such as:
What is SeeB4Coding?
What tutorials are available?
How can I contact you?
What tools are available?
Instead of manually creating a response for every possible question, we’ll give the chatbot information about the website and allow it to search that information.
The basic flow will be:
Visitor
   ↓
AI Chatbot
   ↓
Understand Question
   ↓
Search Knowledge Base
   ↓
Generate Answer
   ↓
Show Response
Step 1: Create a Botpress Account
First, open Botpress.
Create an account and sign in.
Botpress’s current quickstart provides a Start building / Build my agent flow that can create an initial AI agent ready to test and deploy.
Once you enter the workspace, you’ll see your Botpress Studio environment.
Step 2: Create Your AI Agent
Create a new bot and give it a name.
For this example, I’ll use:
SeeB4Coding AssistantYou can use any name you want.
For example:
My Website Assistant
Customer Support Bot
Product Assistant
FAQ Bot
AI Helpdesk
The name isn’t very important at this stage.
What matters is what we tell the bot to do.
Step 3: Give Your Bot Instructions
This is one of the most important parts.
Your AI agent needs to know its role.
For example, you could use the following instructions:
You are a friendly and professional AI assistant
for SeeB4Coding.

Your job is to help visitors understand
SeeB4Coding, its tutorials, tools and resources.

Use the available Knowledge Base when answering
questions.

Keep your answers simple and easy to understand.

Do not make up information.

If the requested information is not available,
tell the user that you don't have enough information.
You can customize this for your own website.
For a company website, for example:
You are a customer support assistant.

Help customers with questions about our products,
services and support.

Use the available Knowledge Base to answer questions.

Do not invent product information or pricing.

If you cannot find the answer, tell the customer
that you don't have enough information.
The idea is simple:
Tell the AI who it is, what it should do, and what it should not do.
Step 4: Understand the Botpress Workflow
Now let’s look at the workflow.
Go to Workflows in the Botpress Studio.
This is where you visually define how the chatbot works.
Botpress describes workflows as sequences of steps, with nodes representing steps and cards representing actions inside those nodes.
Here is the workflow from my Botpress project:

Share
Botpress Studio workflow showing the Start node, Autonomous Node, Knowledge search and End node.
You can see a simple flow:
Start
  ↓
Autonomous Node
  ↓
Search Knowledge
  ↓
AI Response
The nice thing about this approach is that you can visually understand what your chatbot is doing.
Step 5: What is an Autonomous Node?
The Autonomous Node is one of the interesting parts of Botpress.
Instead of creating a separate rule for every possible user question, the AI can decide how to handle the conversation based on its instructions, available tools and knowledge.
For example, a visitor might type:
What tutorials are available for React?Another visitor might ask:
Do you have any React tutorials?Another might simply say:
I want to learn React.These are different sentences, but they may all require the same information.
The AI can understand the intent instead of relying only on exact keywords.
In the workflow shown above, the Autonomous Node also has a Search Knowledge capability.
That is what we’ll configure next.
Step 6: Create a Knowledge Base
Go to the Knowledge section in Botpress.
A Knowledge Base is where you provide information that your chatbot can use when answering questions.
Botpress supports several types of knowledge sources, including:
- Websites
- Documents
- Tables
- Web Search
- Rich Text
- Integrations
For a website chatbot, this is extremely useful.
Instead of putting your entire website into the AI instructions, you can keep the information in a Knowledge Base.
Step 7: Add Your Website
Let’s say your website is:
https://example.comIn the Knowledge Base, choose Website and provide your website URL.
Botpress can discover pages from a root domain or subpath. You can also choose specific pages instead of indexing an entire site.
For example:
example.com
     ↓
Home
About
Products
Pricing
FAQ
Contact
Documentation
You can then choose the pages that should be available to your chatbot.
This is much better than manually copying every page into the bot’s instructions.
Step 8: Add Documents
You can also give your chatbot documents.
For example:
company-profile.pdf
product-guide.pdf
faq.pdf
support-document.docx
Botpress currently supports document sources including PDF, HTML, TXT, DOC, DOCX and Markdown files, with a documented 50 MB limit per document.
This is useful if you are building an internal company chatbot.
For example:
Company Policies
        ↓
Knowledge Base
        ↓
AI Assistant
        ↓
Employee Question
        ↓
Answer
Step 9: Add Information Using Rich Text
You don’t necessarily need a website or PDF.
You can also add information directly using Rich Text.
For example:
Company: SeeB4Coding

About:
SeeB4Coding provides tutorials, tools and resources
for developers and technology enthusiasts.

Topics:
AI
Web Development
JavaScript
React
Flutter
Developer Tools

Support:
Users can contact us through the website.
This is an easy way to test your chatbot when you’re just getting started.
Step 10: Test Your Knowledge Base
Now let’s test the bot.
Ask questions based on the information you provided.
For example:
What is SeeB4Coding?Then:
What topics do you cover?Then:
Do you have React tutorials?The chatbot should retrieve relevant information from the Knowledge Base and use it to formulate an answer.
Botpress’s documentation notes that an Autonomous Node can use a Search Knowledge card to search the configured Knowledge Bases.
Step 11: Test Questions That Are Not in the Knowledge Base
This is an important test.
Don’t only test questions that you know the bot can answer.
Try something like:
What is your office address?If you haven’t provided an address, the chatbot shouldn’t invent one.
This is why instructions such as this are useful:
Do not make up information.

If the answer isn't available,
tell the user that you don't have enough information.
A chatbot that says “I don’t have that information” is much better than one that confidently gives a completely wrong answer.
Step 12: Customize Your Chatbot
Once the chatbot works, you can customize its appearance.
Botpress Webchat allows you to configure things such as:
- Bot name
- Avatar
- Description
- Primary color
- Font
- Theme
- Header style
- Message styling
- Chat launcher
For example, instead of showing:
Botyou can use:
SeeB4Coding AIYou can also add your own avatar and adjust the appearance to match your website.
This makes a big difference when you are deploying the chatbot for actual users.
Step 13: Test the Chatbot in Botpress
Before putting it on your website, test it inside Botpress.
Ask normal questions such as:
HelloWhat can you help me with?Tell me about your website.What tutorials do you have?Also try follow-up questions.
For example:
User:
What tutorials do you have?

Bot:
We have tutorials about AI, web development...

User:
Which one should I start with?
This is where you start seeing the difference between a basic FAQ and an AI-powered conversational assistant.
Step 14: Publish the Bot
Once you’re happy with the chatbot, it’s time to publish it.
Botpress’s current quickstart provides deployment options for adding the bot to a website or integrating it with other channels.
For a website, we’ll use Webchat.
Step 15: Add the Chatbot to Your Website
Go to:
Webchat
   ↓
Deploy Settings
Botpress provides an embed code for your bot.
According to the current Botpress documentation, you can get the embed code from your bot’s workspace under Webchat → Deploy Settings.
It will look similar to:
<script src="https://cdn.botpress.cloud/webchat/..."></script>
<script src="https://files.bpcontent.cloud/..."></script>
Your actual code will be generated by Botpress, so don’t copy the example above directly.
Copy the code from your Botpress dashboard.
Step 16: Add the Code to Your Website
If you have a normal HTML website, add the Botpress Webchat code inside your <head> section.
For example:
<!DOCTYPE html>
<html>

<head>

    <title>My Website</title>

    <!-- Botpress Webchat -->
    <!-- Paste your Botpress-generated code here -->

</head>

<body>

    <h1>Welcome to My Website</h1>

    <p>
        This is my website.
    </p>

</body>

</html>
Save the page and open it in your browser.
You should see your chatbot.
Botpress also provides instructions for WordPress, Wix, Webflow and other website setups.
The Complete Process
At this point, the whole process is actually quite simple:
Create Botpress Account
        ↓
Create AI Agent
        ↓
Add Instructions
        ↓
Create Knowledge Base
        ↓
Add Website / Documents
        ↓
Create Workflow
        ↓
Test the Bot
        ↓
Customize Webchat
        ↓
Publish
        ↓
Add to Website
That’s your first AI chatbot.
What Can You Build With Botpress?
Once you understand the basics, you can build many different types of chatbots.
1. Customer Support Chatbot
Give it your:
FAQs
Product Documentation
Support Articles
Troubleshooting Guides
Customers can then ask questions in normal language.
2. Website Assistant
A website assistant can help visitors find information.
For example:
Where can I find the pricing page?or:
How do I contact support?3. Product Assistant
Give the bot your product documentation.
Users could ask:
Which plan is suitable for a small business?or:
Does this product support API access?4. Internal Company Assistant
You can create a chatbot using internal documentation.
For example:
Employee
   ↓
AI Assistant
   ↓
Company Knowledge
   ↓
Answer
It could answer questions about company processes, documentation and other information you’ve made available to it.
5. Documentation Chatbot
This is one of my favorite use cases.
Imagine you have hundreds of documentation pages.
Instead of asking users to search through everything, you can give the documentation to the chatbot.
Then users can simply ask:
How do I configure this API?The chatbot can search the relevant documentation and respond.
What About Web Search?
Botpress also supports a Search the web knowledge source.
This is different from adding your website.
When you add a website, Botpress indexes the pages you provide.
With Web Search, the bot can search the internet for information when configured to do so. Botpress also provides options to restrict searches to specific websites or search the broader web.
For a company support bot, I’d be careful with this feature.
If you want the bot to answer only from your company’s documentation, it may be better to restrict its knowledge sources rather than letting it search the entire internet.
Is Botpress Completely Free?
This is where the word free needs a little clarification.
Botpress lets you get started and build/test bots without needing to build your own AI infrastructure, but usage limits and available features depend on the current Botpress plan.
Knowledge storage and other resources can also count toward plan limits.
So I wouldn’t describe it as:
Unlimited AI chatbot forever for $0.
A better way to look at it is:
You can start building an AI chatbot without paying for a complete custom AI backend.
For learning, experimentation and small projects, that’s a very useful starting point.
Before using a bot for a high-traffic production website, check the current Botpress pricing and usage limits.
Do You Need to Know Programming?
Not necessarily.
That’s one of the reasons I like tools such as Botpress for beginners.
You can start visually:
Workflow
   ↓
Node
   ↓
Instructions
   ↓
Knowledge
   ↓
AI Response
You don’t need to build an API server just to get your first chatbot working.
Of course, if you’re a developer, you can go further.
You can connect APIs, databases, webhooks and other services when your project becomes more advanced.
A Simple Project to Try
If this is your first Botpress project, don’t start by trying to build the next ChatGPT.
Build something small.
For example:
Website FAQ Assistant
Give the bot:
Company Information
Product Information
Pricing
FAQs
Contact Information
Then test:
What does your company do?

What products do you offer?

How much does it cost?

How can I contact you?

What are your business hours?
Then ask questions that aren’t covered by your Knowledge Base.
This will teach you an important lesson:
The quality of your chatbot depends heavily on the instructions and information you give it.
A Few Tips From My Experience
1. Don’t add everything at once
Start with a small Knowledge Base.
It’s much easier to understand why a bot gives a particular answer when you only have a few sources.
2. Write clear instructions
Don’t write a huge complicated prompt.
Tell the bot:
Who are you?
What should you do?
What information can you use?
What should you avoid?
What should you do if you don't know?
That’s a good starting point.
3. Test real questions
Users won’t always ask questions exactly the way you expect.
Test:
How much?
What is this?
I need help.
Can you explain?
Where do I find it?
4. Don’t let the bot guess
For business chatbots, incorrect information can be worse than no answer.
Make it clear when the bot should say it doesn’t know.
5. Keep responses short
A website visitor usually doesn’t want a huge essay from a support chatbot.
Start with concise responses.
Final Thoughts
Building an AI chatbot doesn’t have to begin with a complicated programming stack.
With Botpress, you can start with a visual workflow, add your own knowledge, configure the AI’s behavior, test it, and then deploy it to your website.
The complete journey can be as simple as:
Idea
 ↓
Botpress
 ↓
AI Agent
 ↓
Knowledge Base
 ↓
Workflow
 ↓
Webchat
 ↓
Website
And that’s what makes Botpress interesting for beginners.
You can start with a small FAQ bot today and gradually turn it into something much more powerful by adding APIs, workflows, databases and integrations.
If you’re learning AI application development, building a small chatbot is a great first project.
Don’t try to build everything at once.
Start with one problem.
Give the bot good information.
Test it with real questions.
Then improve it.
That’s usually how a useful AI chatbot starts.
Frequently Asked Questions
Can I create a Botpress chatbot without coding?
Yes. Botpress Studio provides a visual development environment, so you can build an initial AI agent and workflows without writing a traditional backend.
Can I add my website to Botpress?
Yes. Websites can be added as Knowledge Base sources, and Botpress can discover pages from a root domain or let you specify individual pages.
Can I upload PDFs?
Yes. Botpress supports document sources including PDF, HTML, TXT, DOC, DOCX and Markdown.
Can I put my Botpress chatbot on my website?
Yes. Botpress Webchat provides an embed option that you can add to your website.
Do I need to build my own AI API?
Not for a basic Botpress chatbot. Botpress handles much of the agent infrastructure for you, allowing you to focus on the bot’s behavior, knowledge and user experience.