
DeepSeek-R1 is an advanced open-weight large language model (LLM) optimized for reasoning, code generation, and general AI tasks. Running DeepSeek-R1 on your local machine allows you to experiment, fine-tune, and utilize its capabilities without relying on cloud-based services. In this guide, we’ll cover how to set up and run DeepSeek-R1 on your system using Ollama for a simplified experience.
Prerequisites
Before getting started, ensure you have the following:
- A machine with a powerful GPU (NVIDIA with CUDA support recommended)
- At least 16GB RAM (32GB+ recommended for better performance)
- Python (version 3.8 or later)
- Git
- CUDA and cuDNN installed (for GPU acceleration)
- PyTorch installed with GPU support
About DeepSeek-R1
DeepSeek-R1 is DeepSeek’s first-generation reasoning model, achieving performance comparable to OpenAI-o1 across math, code, and reasoning tasks. It includes several dense models distilled from DeepSeek-R1 based on Llama and Qwen. The available model sizes include:
More Details: https://www.deepseek.com/
- DeepSeek-R1 Models: 1.5B, 7B, 8B, 14B, 32B, 70B, and 671B parameters.
- Distilled Models:
- DeepSeek-R1-Distill-Qwen-1.5B
- DeepSeek-R1-Distill-Qwen-7B
- DeepSeek-R1-Distill-Llama-8B
- DeepSeek-R1-Distill-Qwen-14B
- DeepSeek-R1-Distill-Qwen-32B
- DeepSeek-R1-Distill-Llama-70B
DeepSeek has demonstrated that the reasoning patterns of larger models can be distilled into smaller models, leading to better performance compared to reinforcement learning (RL) on small models.
Step 1: Install Ollama
Ollama provides an easy way to run LLMs locally. To install Ollama, visit:
Download and install Ollama based on your operating system (Windows, macOS, or Linux).
Step 2: Download and Run DeepSeek-R1
Once Ollama is installed, you can download the DeepSeek-R1 model from its official library page:
Alternatively, open a terminal and run the following command:
ollama pull deepseek-ai/deepseek-r1
To run a specific model size, use:
ollama run deepseek-r1:1.5b  # Runs the 1.5B model
ollama run deepseek-r1:7b    # Runs the 7B model
ollama run deepseek-r1:70b   # Runs the 70B model
Step 3: Use DeepSeek-R1 via API
Ollama provides an API to interact with the model programmatically. You can use Python to send queries:
import requests

response = requests.post(
    "http://localhost:11434/api/generate",
    json={"model": "deepseek-ai/deepseek-r1", "prompt": "Explain quantum computing"},
)

print(response.json()["response"])
Step 4: Optimizing Performance
- Ensure CUDA is enabled by running
torch.cuda.is_available()in Python. - For better performance, enable quantization using
bitsandbytes:
pip install bitsandbytes
- Use
torch.compile()in PyTorch 2.0+ for performance improvements:
import torch
model = torch.compile(model)
Step 5: Try DeepSeek Models on Hugging Face
You can also explore DeepSeek models interactively on Hugging Face Spaces:
👉 DeepSeek-Coder-33B-Instruct on Hugging Face
Step 6: Running DeepSeek-R1 in VS Code with Continue.dev
If you prefer using VS Code, you can enhance your workflow with Continue.dev, an extension for local AI-powered code completion. To install:
Install the Continue Extension in VS Code:
- Open VS Code.
- Navigate to the Extensions view by clicking on the Extensions icon in the Activity Bar on the side of the window or by pressing Ctrl+Shift+X.
- Search for “Continue” and click the Install button.
- Alternatively, you can install it directly from the Visual Studio Marketplace.
Configure the Continue Extension:
Open VS Code settings (Ctrl+,).
Search for “Continue” in the settings search bar.
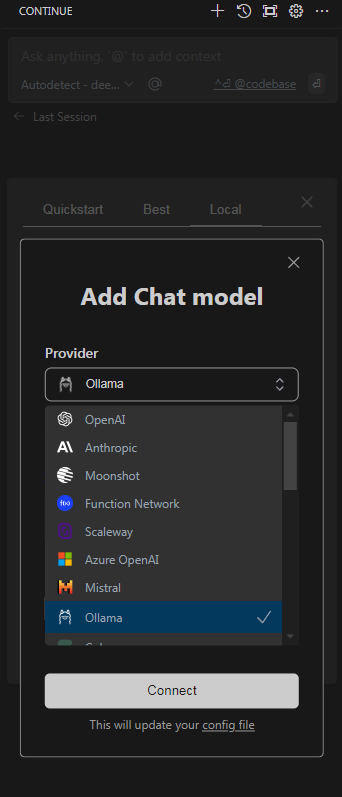
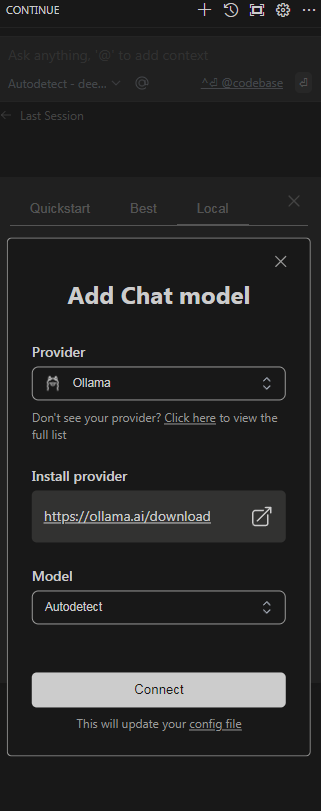
Locate the “Continue: AI Model” setting and select “Ollama” from the dropdown menu.
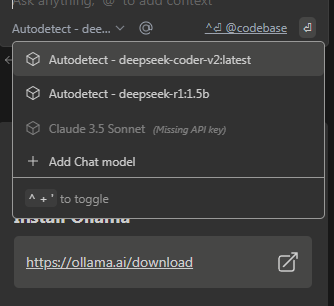
ADD Chat Model
Choose Model Level:
If there’s a “Model Level” setting, you can choose “Auto detect” from the dropdown. This will let the extension automatically choose the most appropriate model level based on the context or input.
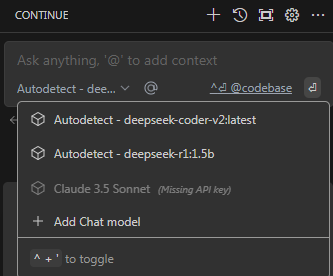
After clicking Connect, VS Code will detect the available model based on the settings you’ve configured.
In the Continue extension panel or the settings page, look for an option to select the detected model. It may automatically select DeepSeek-Coder-V2 if it’s the only available model, or you might need to confirm it.
Start Chatting Without Internet:
Using the model to assist with different development tasks.
Since you’re using the model locally with the Ollama setup, the model will run directly on your machine without requiring an internet connection.
Once the model is connected and selected, you can start interacting with it. This can include:
Asking the model to help you with coding tasks.
Receiving code completions, suggestions, or troubleshooting guidance.
You can now use DeepSeek-R1 directly within VS Code for an improved coding experience.
Step 7: Deploy DeepSeek-R1 as a Web App with Open-WebUI
To create a web-based interface for DeepSeek-R1, use Open-WebUI, a self-hosted web UI for interacting with models like DeepSeek.
To set up:
git clone https://github.com/open-webui/open-webui.git
cd open-webui
docker-compose up -d
This will launch a local web-based chat interface for DeepSeek-R1.
Step 8: Fine-Tuning and Customization
Ollama allows you to fine-tune and create custom models. You can define custom model parameters using:
ollama create my-custom-model
For further enhancements, consider deploying DeepSeek-R1 with an API server using Flask or FastAPI.
Licensing Information
The DeepSeek-R1 model weights are licensed under the MIT License, allowing commercial use, modifications, and derivative works, including distillation for training other LLMs. However, some distilled models have additional licensing considerations:
- Qwen distilled models are derived from Qwen-2.5 (Apache 2.0 License) and fine-tuned with 800k samples from DeepSeek-R1.
- Llama 8B distilled model is derived from Llama3.1-8B-Base (Llama3.1 License).
- Llama 70B distilled model is derived from Llama3.3-70B-Instruct (Llama3.3 License).
Conclusion
Congratulations! You have successfully set up and run DeepSeek-R1 on your local machine using Ollama. You can now fine-tune the model, experiment with different datasets, and integrate it into your applications.
Happy coding! 🚀


JJz jbCkFaKL jPp yoIxb